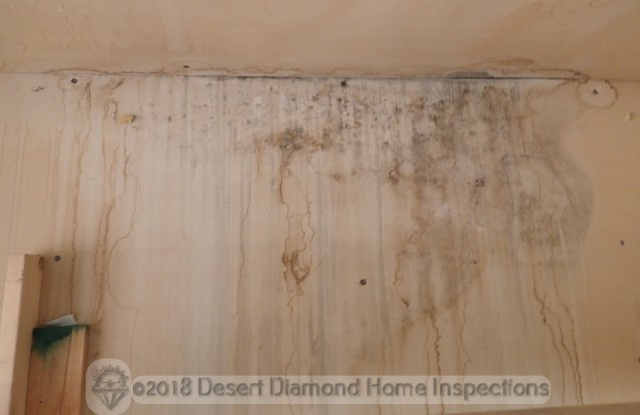
One of the most common issues home inspectors see is water damage due to plumbing leaks. Plumbing leaks happen due to age, wear and tear, poor quality components, or deferred maintenance. Some very common examples are a leaking shut-off valve, a hose or pipe developing a leak or failing altogether, or an appliance component failing. If a home owner does not detect a leak right away, water can do a lot of damage to a home such as:
- Ruined drywall
- Wood rot (siding, cabinets, framing)
- Mold
Proper repairs for such water damage are very expensive, especially if it involves framing replacement or mold mitigation. Fortunately there are easy and simple things homeowners can do to minimize water damage from plumbing leaks or prevent them altogether.
Preventing water damage from plumbing leaks
The following tasks are simple steps that every home owner should consider to keep their home dry. They are easy to do and take only a few minutes. Some of these steps do not cost anything. Some of them cost a modest amount of money. If you think for a moment about the grief and hassle, not to mention the thousands of dollars of repair cost, that a plumbing leak could cause you, these simple steps should be a no-brainer.
Visual inspection
Visually inspect the areas where water is likely to leak from plumbing pipes, valves, or appliances. The most common locations for plumbing leaks are:
- Under sinks
- At toilets
- Behind the washing machine
- Under the dishwasher
- At the water heater
To check for leaks:
- Turn on the faucet at every sink, then examine the drain pipe underneath the sink as well as the water supply lines going to the faucet. Look for drips and run your hand along the bottom of the pipes and valves.
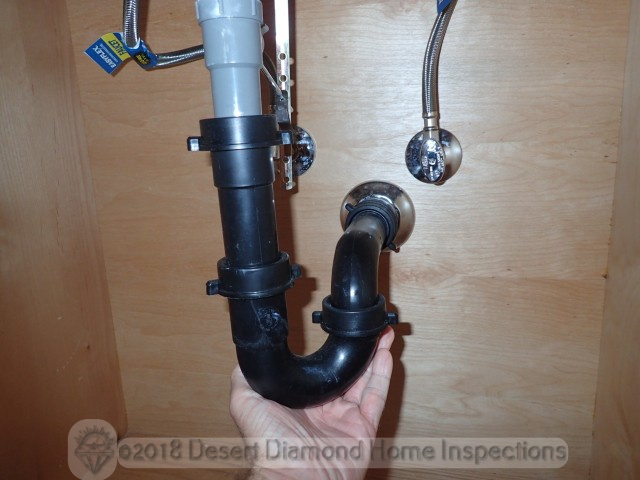
Checking for leaks at drain pipes by running your hand underneath - Flush the toilet, then look carefully around the base of the toilet, at the water supply line, and at the connection between the tank and the toilet.
- Run a load of laundry, then look at the valves and hoses behind the washer for leaks or drips. Also look around the bottom of the washer.
- Run the dishwasher, then look under the kitchen sink at the water supply line as well as the drain line which usually connects to the garbage disposal. Also check underneath the dishwasher.
- Examine the water heater. At the top, look for leaks at the nipples where the hot and cold water lines connect and at the water shut-off valve. At the bottom, look for leaks coming from below the tank.
Scheduled maintenance
While we tend to use our appliances and take it for granted that they just work, appliances usually require some type of maintenance. For example, water heaters should be flushed every year, and the anode rod inside the tank should be replaced every five to six years.
Check the manuals for your appliances to find out what specific maintenance they require at what intervals. If you do not have the manual, you can usually download it as a PDF file from the manufacturer’s website.
Operating valves
Any plumbing valve that does not get used for a long time will eventually get stuck and no longer move. This is obviously going to be a problem if you discover a leak but cannot shut off the water supply.
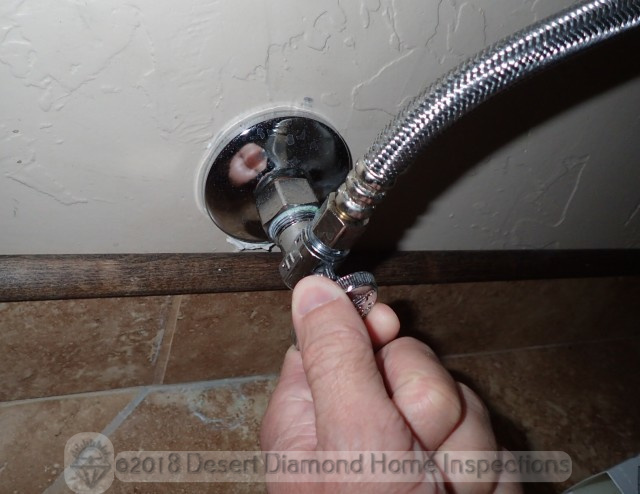
To ensure shut-off valves work as intended, you should test every single one of them at least once a year. Simply find all the shut-off valves in your house at sinks and toilets, washing machine and dishwasher, water heater, and of course the main shut-off at the outside of the house and/or at the meter.
Check that they are working by turning them off and back on again. If they do not move, if they start leaking, or the handle breaks off, call a plumber and have the valve replaced.
Tip: Check your valves on a weekday morning. If something breaks, you can get a plumber to come out right away to fix it.
Water detector alarms
Even if you check every week, a leak could go undetected for several days in which water can do quite some damage. For an immediate alert the second something is leaking, you can install a water detector alarm in every of the five locations mentioned above.
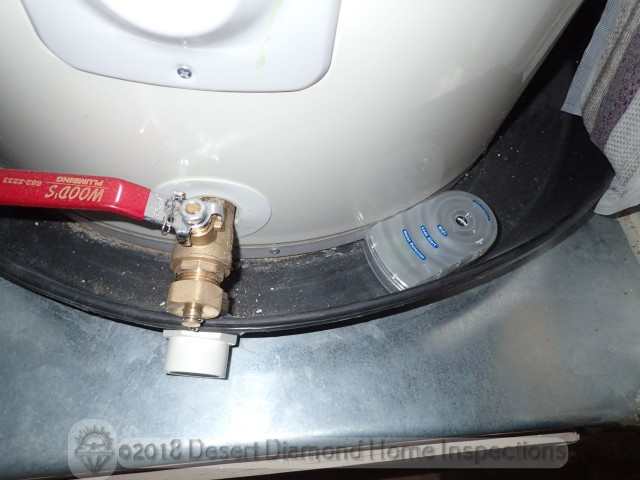
A water detector alarm is a small device that is battery operated and has a moisture sensor. As soon as the sensor detects moisture, it will sound an alarm. Some models, like the one I have in my house, can connect to your WiFi and send you an email. Other models tie in with home automation or alarm systems.
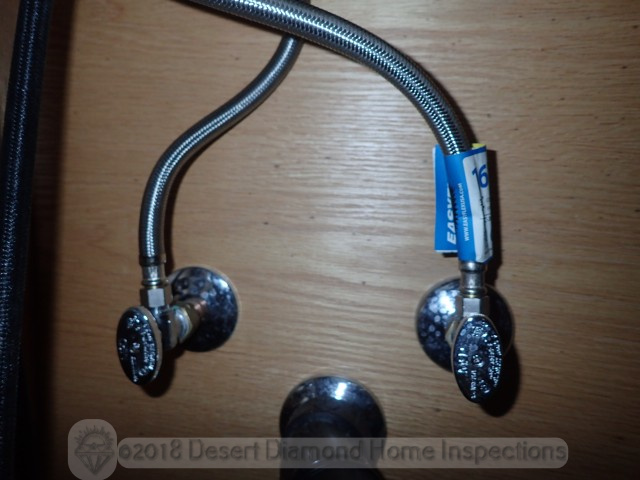
Quality plumbing components
There is a much higher chance of plumbing leaks at sinks, toilets, and appliances if the valves and hoses are of poor quality. Cheap plastic valves and hoses will deteriorate over time, especially in the dry Arizona climate. An old rubber supply line that was fine for 20 years can suddenly split and start dumping water all over your floor.
Have a plumber swap out any cheap or old valves and hoses for new ones. Valves should be metal ball valves. Hoses should be braided stainless steel flex lines with metal connectors.
Conclusion
As you can see, preventing water damage from plumbing leaks is pretty easy and does not cost much. We recommend you put recurring reminders on your calendar to help you remember when it’s time to perform these tasks. Don’t forget to add a reminder to replace the batteries in the water alarm detectors.
Here’s to a happy and dry home.